AI clothing photography
Your clothing.
A different setting.
Explore a new presentation, starting with a garment photo.
Use ProductAI to try studio and lifestyle directions for your clothing imagery. Start with a clear photo, describe the setting you want, and review the result against the real garment.


A closer look
From a door
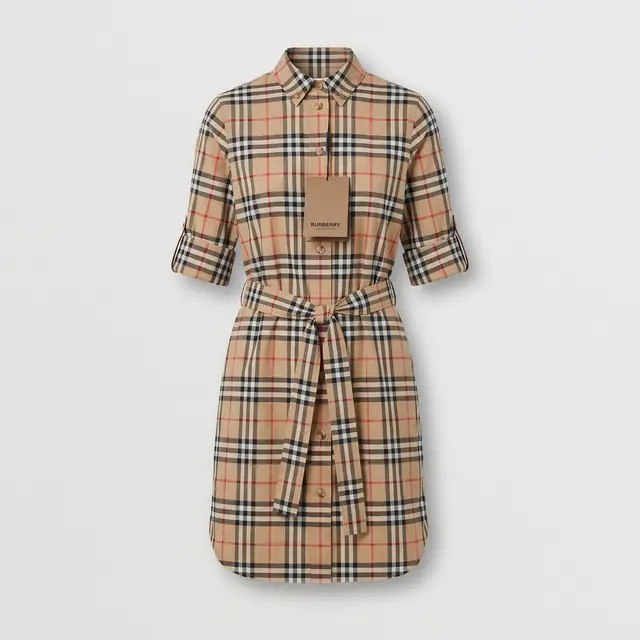
to a simple backdrop.
The original shows a check shirt dress on a hanger. The generated image removes the door and hanger from the composition and presents the dress against a neutral background.
Look closely at the belt and folds: their arrangement differs between the two images. Use the comparison to judge whether a result represents the garment accurately enough for its intended use.
View more before & after examples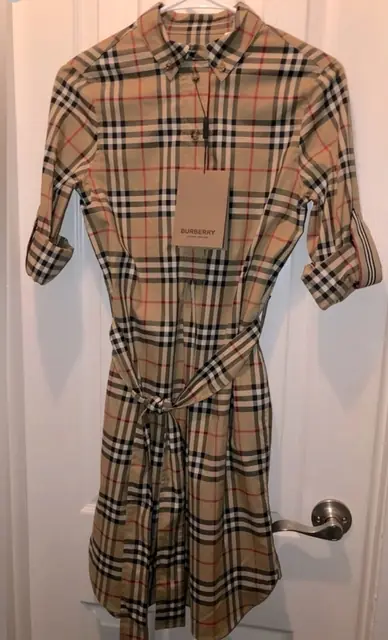
Before you generate
Give the details
room to show.
A clear input makes it easier to describe what you want and compare the result. Prepare the photo with the garment’s defining details in mind.
Show the whole garment.
Keep sleeves, hems, and edges in frame. Arrange the garment so that overlapping fabric does not hide the shape you want to show.
Make color and texture visible.
Use even light and a sharp photo. Avoid strong color casts or deep shadows across prints, seams, and fabric texture.
Choose a specific direction.
Describe the background, lighting, and composition you want. For example: “A simple warm-grey studio background, soft light, and the full dress in view.” This is a suggested starting direction, not the prompt used for the example above.
Before you publish
Check the garment.
Then the photograph.
Compare the generated image with your source at full size. If a detail changes, try another version or use the original photograph for that view.
Pattern & color
Follow stripes, checks, and prints across seams. Compare their scale and placement as well as the base color. New lighting can make a fabric look different.
Shape & construction
Check sleeve length, neckline, hem, pockets, closures, and belt placement. Generated folds or proportions can change how the garment appears to hang.
Labels & small details
Read visible text and inspect logos, buttons, and stitching. Keep original close-ups for details a shopper relies on; AI can invent or alter them.
Clothing photography questions
Before you begin.
Can I start with a photo on a hanger?
Yes—the dress example starts with a hanger photo. Keep the full garment visible and review any areas where the hanger or fabric folds affect the result. This example illustrates one result, not a guarantee for every garment.
Will the pattern, logo, and fit stay exactly the same?
They may change. Compare the output with your original and keep real photos for exact pattern, label, and fit information. A generated image cannot verify how clothing fits a person.
Can these images replace every photo in a listing?
Use them where a new setting helps explain a collection or visual idea. Keep original detail and fit photographs where accuracy is essential, and check the image requirements of the store or marketplace where you publish.
Where do I create the images?
Download ProductAI for iOS or Android using the links below. Add your product photo in the app, choose or describe a scene, and review your result. Current prices and credit requirements are shown in the app.
ProductAI for iOS & Android
Give your next garment
a new setting.
Bring a clear photo. Choose a direction. Keep the details in view.